I recently scored a big vintage box of retro accessories online:
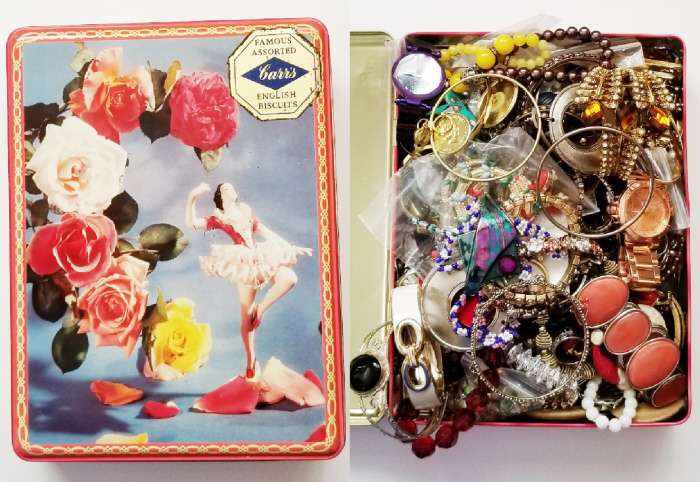
It was absolutely overflowing with fab treasures!
Unfortunately more than few of the items were in less than stellar condition, fortunately my 4 easy fixes for broken jewellery can be used to repair a variety of accessories:
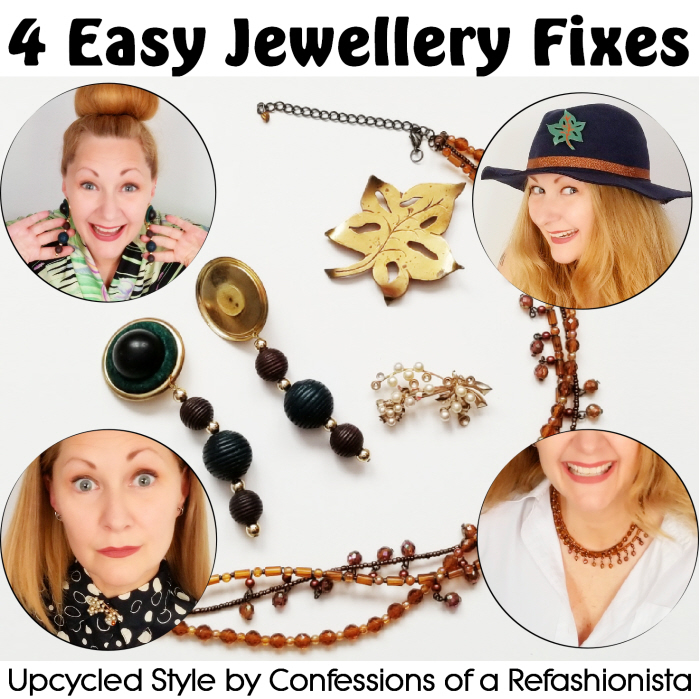
Check out the mending ideas below and tweak them to suit your own quick fixes!
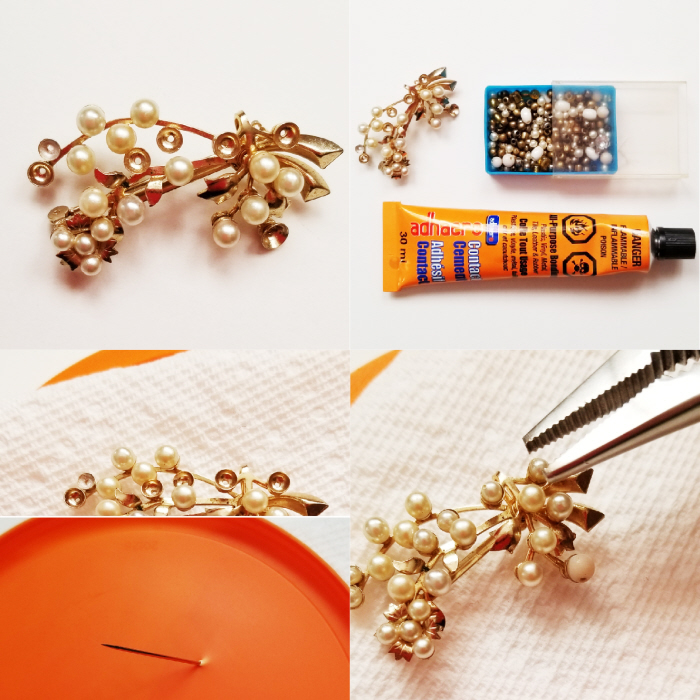
Missing jewellery components:
Step 1: Check through your stash for similar items + grab some all-purpose glue. Step 2: Secure the jewellery to something so it doesn’t move (I used a plastic lid) Step 3: Carefully apply glue, stick the new components in place & allow to dry completely.

Who else loves combining vintage brooches & blouses?
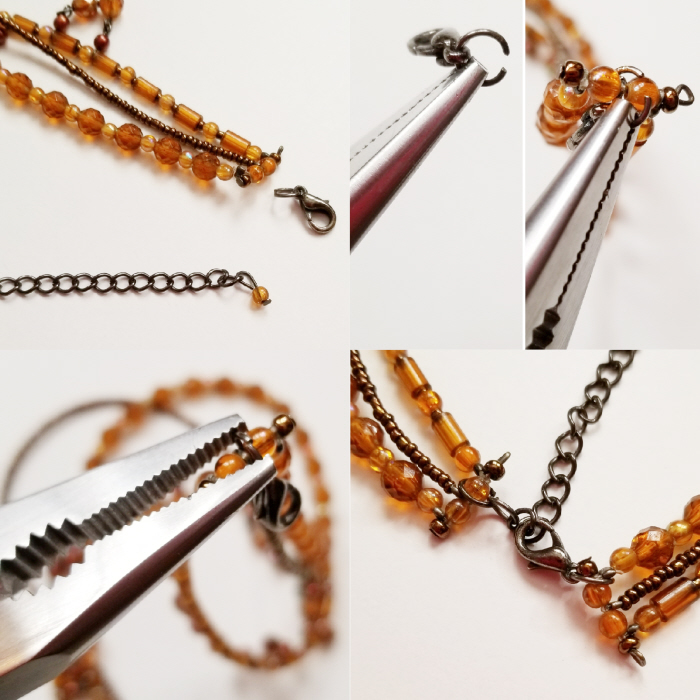
Broken or missing clasp:
Step 1: Grab a clasp & jump ring from your stash (or source from another piece of unwanted jewellery). Step 2: Pop the clasp on the jump ring & position in place. Step 3: Carefully squeeze the ends of the jump ring together to secure.

Can’t find any preloved jewellery supplies? Clasps, pin backs, earring hooks & so much more are easily found in the craft section of most dollar stores.
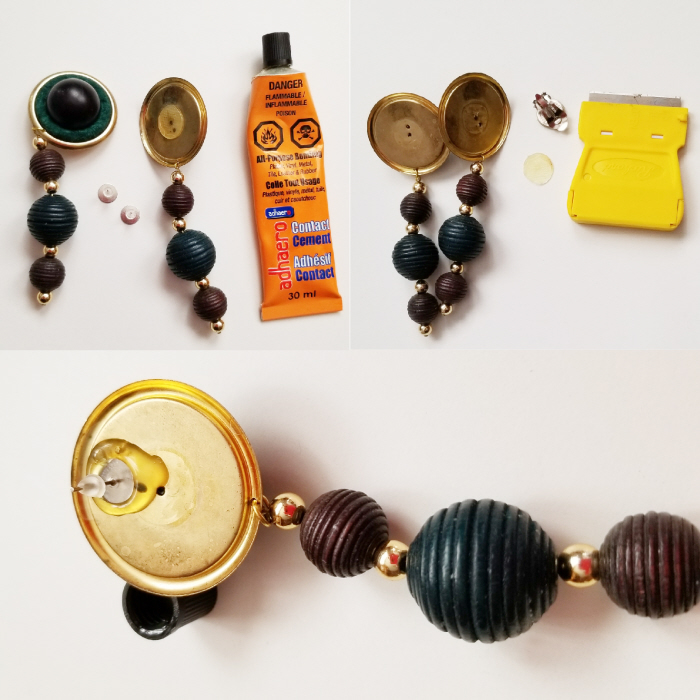
Missing earring posts:
Step 1: Snag your preferred earring posts + all-purpose glue. Step 2: Remove any residue from the back of the earrings. Step 3: Apply a generous amount of glue, attach the new posts & allow to dry completely.

These are perfect with my groovy 70’s tea gown!
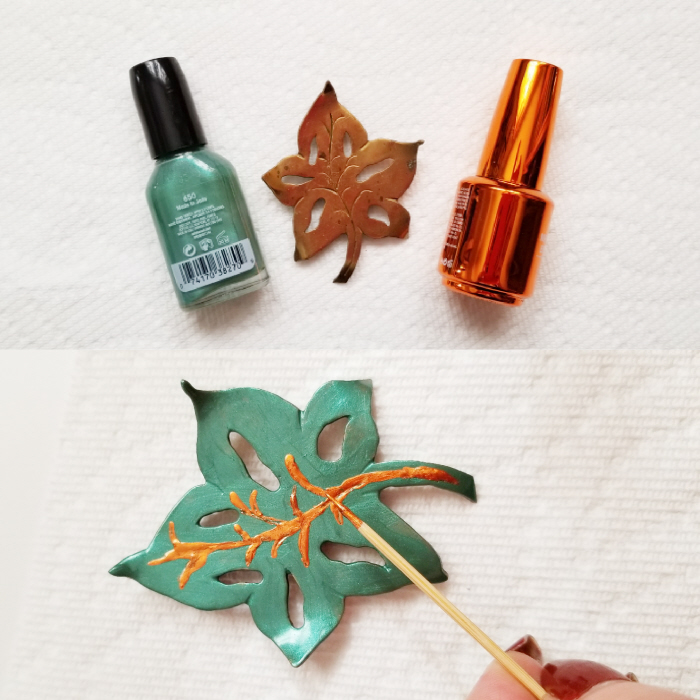
Discoloured or stained jewellery:
Step 1: Snag some lovely nail polish colours. Step 2: Paint the jewellery with the polish + give it a clear top coat for extra protection.
Quick tip: use a toothpick to add details & make your new to you jewellery really pop!

Grab all of my upcycled jewellery tutorials here and for more sustainable DIY style goodness check out my Confessions of a Refashionista e-book series for less than a latte!
Simply download & get started creating your own, unique, ethical, DIY eco-style!
