Got a boring bag in your stash? A purse that has seen better days?
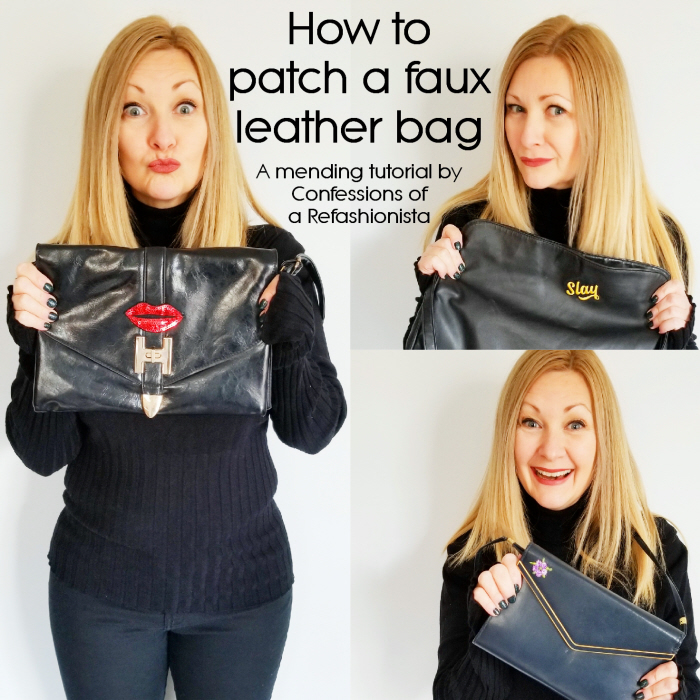
Take a peek at my 2 easy methods for how to patch a faux leather bag and fix those less than stellar totes and purses in a flash!

Add a bit of bling to a boring bag with a fun sequin patch + a bit of all purpose glue!
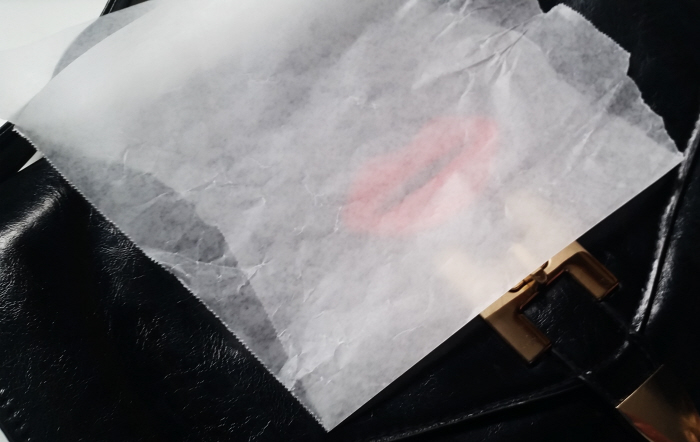
Apply glue to the back of the patch, place it on the bag and cover with a bit of wax paper.

Stack a few heavy books on top and leave to dry and set over night.
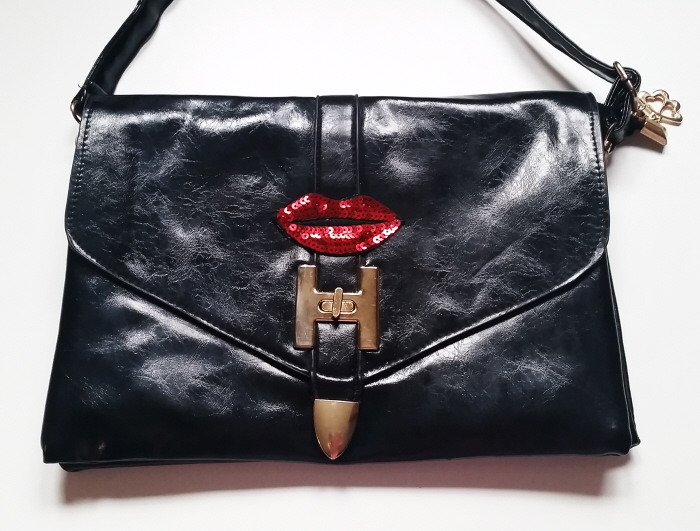
Et voila! A groovy new to you bag!
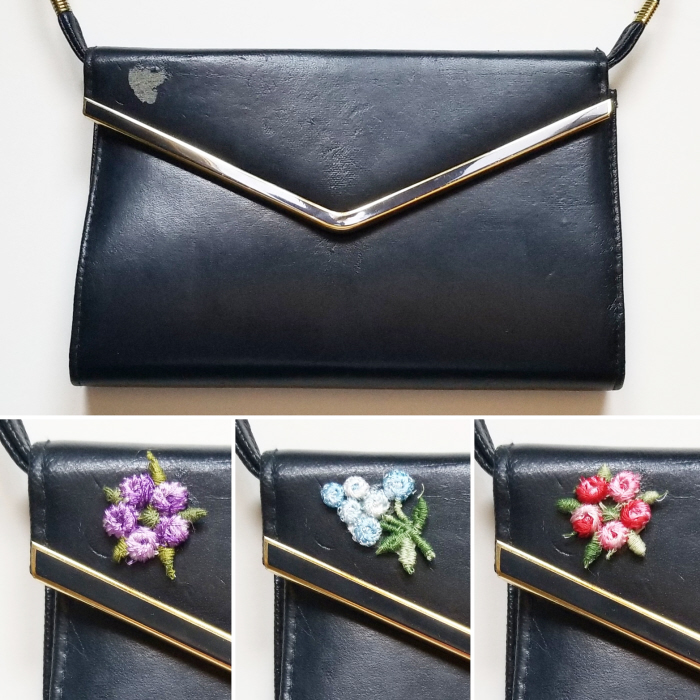
I used the technique above to cover the damaged area of that vintage bag with one of my pretty floral patches.
Fabulous!
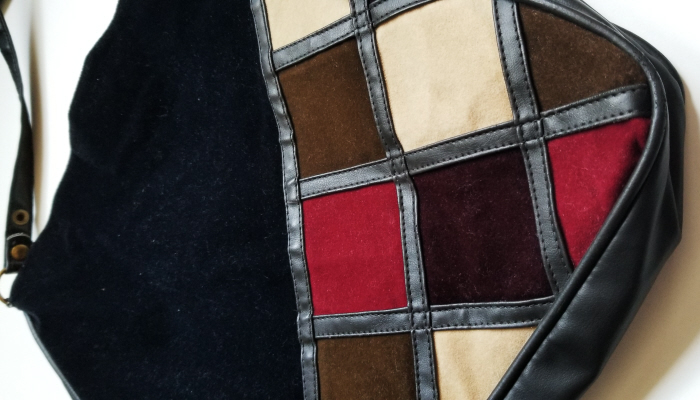
I’ve had this stunning vintage bag for years, unfortunately someone decided to flick their disgusting cigarette butt onto it as they walked past me, grrrr!
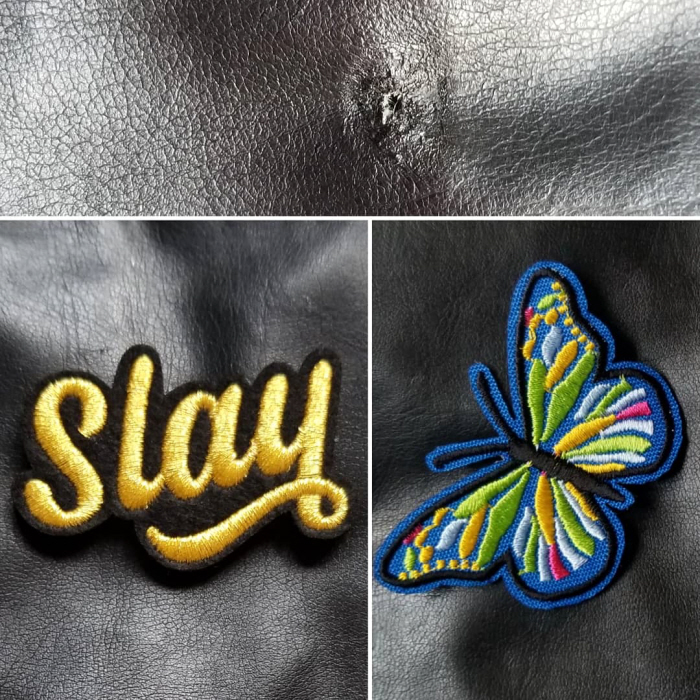
Fortunately I had the back facing out so the front wasn’t damaged, whew!
First, I scraped off as much of the crusty, burnt area as possible then chose an iron-on patch large enough to cover the burn mark from my stash.
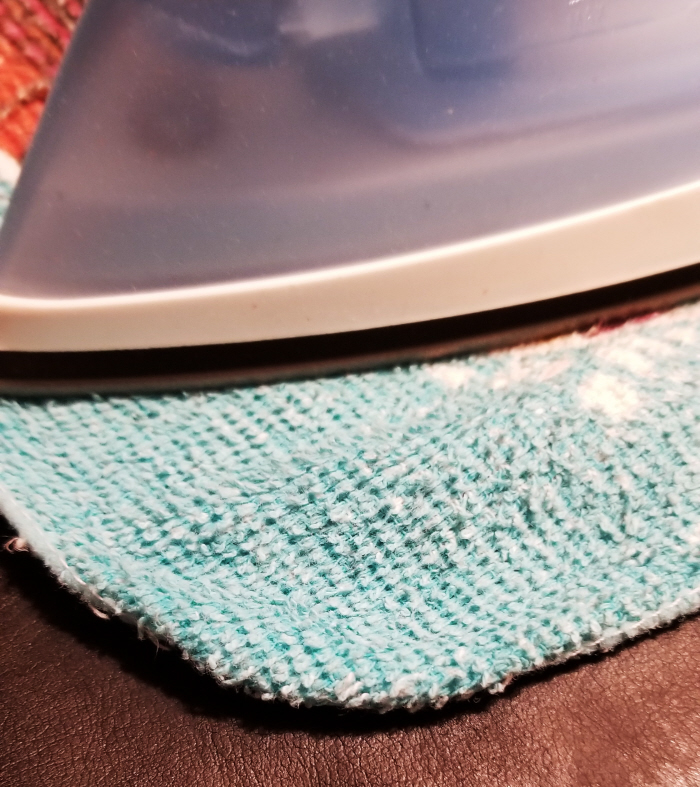
Arranged it over the damaged spot, placed a cloth over top of the patch and then ironed it on with a medium heat being careful to avoid touching the faux leather fabric with the iron.
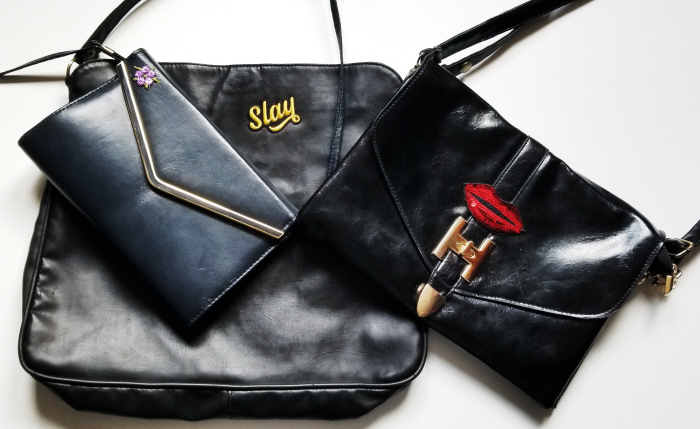
And there you have it! Three less than stellar faux leather bags mended and transformed with two simple methods!

Find all of my upcycling goodies at RefashionistaSheri.com